How to Cup Coffee at Home
Cupping coffee is the best way to compare and contrast different coffees to develop your palate and to learn more about the intricacies of the humble coffee bean.
It’s also a great way to involve your friends and family who doubt that coffee can be such an amazing experience.
Equipment for cupping coffee
- 2 – 5 different coffees
- One vessel per coffee: identical bowls or cups with a capacity of around 200 – 300ml (if you don’t have the same sized vessels, see the non-identical cupping bowls section at the end of the article)
- Filtered or bottled water
- Kettle
- Two tablespoons or soup spoons plus one for each taster
- Coffee grinder
- Precision scales
- Digital scales
- Two extra vessels (can be different)
Method
Read through all the steps before starting.
Step 1:
Measure your bowl’s capacity.
Place the empty bowl on your scales and tare. Fill to the brim with water and note down how many grams it holds.
Here is how much coffee and water you’ll need for your bowl size:
| Bowl size (grams) | Coffee (grams) | Water (grams) |
| 200 | 10 | 167 |
| 210 | 10.5 | 175 |
| 220 | 11 | 183 |
| 230 | 11.5 | 192 |
| 240 | 12 | 200 |
| 250 | 12.5 | 208 |
| 260 | 13 | 217 |
| 270 | 13.5 | 225 |
| 280 | 14 | 233 |
| 290 | 14.5 | 242 |
| 300 | 15 | 250 |
Step 2:
Adjust grind size to medium. Think somewhere around coarse sand.
Turn on the grinder and move to a medium setting. Run 15g of coffee through the grinder while it is still running. Discard or use for cold brew.
Why? When you move grind settings, the first cup’s worth of beans you run through will be somewhere between the previous grind setting and the new one. It also serves to purge any old coffee that was trapped in the grind chute.
Step 3:
Grind your coffees.
Grind the first coffee and add to one of the bowls. Repeat with each subsequent coffee.
Label each coffee packet and bowl with a letter. Add the ground coffee to the appropriate bowl. This is so that you can match them later on, comparing your notes with that of the roaster.
Important: Put the coffee packets somewhere out of sight after grinding. The packets’ labels will influence your judgment.
Recommended: Before you grind the subsequent coffees, run one extra gram (approximately 6 beans) of the new coffee through the grinder and discard. This is to purge the grinder of the previous coffee.
Step 4:
Boil your kettle.
Allow the water to come off the bowl for 30 – 60 seconds or until the temperature reaches 96°C (205°F) if you have a thermometer.
For best results, don’t use normal tap water. You’ve gone to a lot of trouble to organize this cupping, so don’t skimp on the water. I recommend buying a 1.5l bottle of Volvic water for cupping.
Step 5:
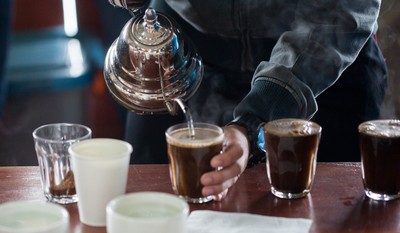
0:00′. Fill each bowl with the appropriate amount of water (see chart in Step 1).
- Place each bowl on the scale and tare.
- Pour water in each bowl, making sure to saturate all the coffee grounds. Do not stir.
- Set your timer for four minutes.
Note: Fill one of the extra bowls with water for rinsing your spoons.
Step 6:
4:00′. Break the crust in each coffee.
You’ll notice that the coffee has formed a ‘crust’ at the top of the bowl.
- Break the crust by pushing gently downwards with a spoon.
- Give it three gentle stirs.
This will make the coffee grounds fall to the bottom of the bowl.
You’ll now be left with a scum on the top.
- Take your two spoons and glide them around the sides of the bowl, scraping and scooping up as much of the scum as possible.
- Discard into the remaining empty bowl.
- Repeat for each bowl. Clean your spoons in the hot water between breaking the crust in each bowl.
Try to get rid of as much of the scum as possible. This takes a little practice. You can always go back and scoop up anything you missed the first time, but don’t obsess about it; there’ll always be a small amount left. Try to work through this part fairly quickly.
Step 7:
5:00′. Wait 10 minutes before trying the coffees.
Don’t be tempted to give the coffees a try at this point. For one they’re too hot and you’ll burn your tongue, and the other is that they’re so hot that you wouldn’t be able to taste the beautiful flavours anyway.
Step 8:
15:00′. Start to taste.
- Take your spoon and dip it just below the surface of the liquid, part filling the spoon with coffee.
- Bring it up to your lips and pull it into your mouth with a sucking motion to spray the coffee over your tongue. This aerates the coffee and allows you to taste it better.
You may have noticed that the professionals spit out their coffee. This is so as not to exhaust the palate. It’s up to you whether you do this, but if you have more than three coffees, it’s a good idea. You’ll quickly wear your palate out, and it’ll stop you from bouncing off the walls with caffeine.
Step 9:
Make notes.
Write down whatever you notice about the coffee. Don’t get hung up on what you should be noticing. Just enjoy it. You will only notice more and more of the subtleties by trying more and more coffees.
No one is able to perceive the inherent coffee flavours when they’re just starting out. Something to remember if you think someone is trying to show off.
Write as much as possible because nothing is too daft. In the words of Stephen Leighton of Has Bean Coffee,
“if you can taste it, it’s there.”
Read on further down to find out how to taste and describe coffee like a pro.
Step 10:
Clean your spoon and repeat, working your way through the bowls of coffee.
It’s very important to not talk during a cupping and not even to pull any facial expressions. Think of cupping like playing a game of poker. What you say or gesture will definitely influence others.
Step 11:
Discuss.
When you’ve either finished all the coffee or the coffee has become too cold to enjoy, discuss what you’ve written with others.
How to taste and describe coffee
Cupping can be quite intimidating at first, especially if you do it with someone more experienced than you.
I’m going to help you put those anxieties to one side by showing you what to look out for so you can write something other than the word coffee in your notepad.
Compare and contrast. That’s essentially what cupping is about. Without at least two coffees, you have no point of reference.
Think about things such as mouthfeel, sweetness, acidity, bitterness, balance, flavour and aroma.
Mouthfeel
- What is the texture like?
- Does it have a lot of body?
- Is it thin?
- Creamy?
- Smooth?
- Light?
- Heavy?
- Clean?
- Tea-like?
Sweetness
- Is the coffee sweet?
- Which coffee is the sweetest?
- Could you grade the sweetness by comparing it to a particular food?
- Would you drink the coffees without adding sugar?
Acidity
- How acidic is the coffee?
- Is it balanced or overwhelming?
- Is it tart like a green apple?
- Is it refreshing like a pineapple?
- Is it citrusy like a lemon?
- Is it sharp like vinegar?
Bitterness
- Does the coffee have any bitterness?
- Is it overwhelming?
- Does it muddle the flavours?
- Did you grind too fine which caused bitterness?
Balance
- How balanced is the coffee?
- Does one aspect such as acidity, sweetness or bitterness dominate?
Flavour and aroma
- What can you smell and taste?
- Common flavours and aromas include: chocolate, nut, caramel, fruits, and floral.
- Are the flavours and aromas enjoyable?
- Does the smell differ from the taste?
Don’t get hung up on noticing individual flavours at first. This will come naturally as you try more and more coffees.
Some common flavour characteristics by country
Brazil: bittersweet chocolate and nuts.
Colombia: cocoa, caramels, fruity.
El Salvador: milk chocolate, apple, plum.
Guatemala: chocolate, nut, orange
Ethiopia: blueberry, strawberry, jasmine, and rose.
Kenya: blackcurrant, black tea, tomato.
Rwanda: toffee, currants, stone fruits
India: black pepper, licorice, leather, tobacco.
Home cupping vs professional cupping
Cupping coffee at home is a lot different from industry cuppings. Industry cuppings are carried out to evaluate the quality of coffee beans which determine such things as price.
Coffee roasters cup their coffee after roasting to determine whether the coffee has been under- or over-developed, or whether they think the coffee would benefit from a lighter or darker roast as well as many other factors including roasting consistency.
Cafés also cup coffees to decide which coffees they want to put on their menu. Many roasters send samples to cafés to encourage the purchase of their coffees.
Cupping at home isn’t so serious. It’s a lot of fun, and it’s done primarily as a way to improve your knowledge of coffee.
If you’re just starting out, I recommend that you buy yourself some very different coffees to try side by side. Once you pick up on a certain flavour, it’ll stay with you for a lifetime. You’ll notice it each time it’s present in coffees in the future.
Talk to or email your favourite coffee roaster and ask if any of the coffees they have on offer have any big, easily-detectable flavours or aromas.
Don’t be put off by what you read on some coffee packets. So many factors influence how a coffee tastes. Unfortunately, a lot of coffee roasters like to show off by including flavour nuances that you’re not likely to pick up on at home.
Cupping with friends and family
Cupping with friends and family is a great way to show them that you haven’t gone completely insane, and that coffee does have a wide range of flavours, textures and aromas.
If you have friends that are also into coffee, exchange a cup’s worth each time you buy a packet so that you can try new coffees and quickly improve your palate. You might even enjoy how one particular roaster roasts, too.
If you’re cupping with coffee-skeptics, I recommend cupping your usual specialty coffee alongside one regular, cheap supermarket coffee. This will really highlight how superior specialty coffee is.
Non-identical cupping bowls
There’s a good chance you don’t have several of the same sized bowls or mugs. Don’t worry, it’s not a problem for home cupping. However, you will need to weigh each vessel to ensure you have a consistent coffee to water ratio of 60g of coffee per litre of water.
Coffee to water ratio for cupping
To determine how much coffee you’ll need for each vessel, do the following:
- Place vessel on scale and tare.
- Fill to the brim with water.
- Note down the weight. Empty water.
- Divide water weight by 20. That figure is how many grams of coffee you’ll need.
To determine how much water you’ll now need to add to the coffee, do the following:
- Multiply the coffee weight by 16.6. That is how many grams of water you’ll need.
For example: for a vessel with a water weight of 240g, you would do the following calculation:
240 ÷ 20 = 12
12 × 16.6 = 200
That’s 12 grams of coffee and 200 grams of water for a vessel size of 240g.
Why is it so complicated? The problem is that you can’t just subtract the coffee weight from the vessel capacity.
This is because fresh coffee blooms (“swells”) to around 3.5 times its volume when water is added to it. You have to compensate for the bloom by using less water.
Confused? Don’t worry, just use our handy size chart.

